- Home Page
- Company Profile
-
Our Products
- Laboratory Chemical
- Ammonium Compounds
- Aluminium Compounds
- Barium Compounds
- Copper Compounds
- Lead compounds
- Magnesium Compounds
- Potassium Compounds
- Sodium Compounds
- Zinc Compounds
- Chemical Packaging
- General Chemical
- Laboratory Solvents
- Laboratory Stains & Indicators
- Water treatment Chemical
- Laboratory Centrifuge
- Laboratory Glasswares
- Laboratory Plasticwares
- Microscope
- Biology
- Chemistry Lab Equipments
- Physics Lab Instruments
- NEWTONS COLOR DISC
- Wire Wound Rheostats
- Slotted Weight
- PLUG TYPE RESISTANCE BOX
- Lab Post Office Box
- Micrometer Screw Gauge
- Vernier Caliper
- COMPOUND PENDULUM
- KATERS REVERSIBLE PENDULUM
- MAXWELL NEEDLE
- Conductivity Apparatus Lees and Charltons
- Laboratory Flywheel
- TORSION PENDULUM
- Poiseuilles Viscosity Apparatus
- Viscosity Apparatus Stokes Method
- U-Tube Manometer
- Stefans Radiation Constant Apparatus
- Resistance Box
- Continuous Flow Calorimeter
- Copper Constantan Thermocouple
- Jaggers Surface Tension Apparatus
- WAVE MOTION APPARATUS
- LINEAR EXPANSION APPARATUS
- Laboratory Inclined Plane
- Laboratory Sonometer
- Laboratory Meter Bridge
- Linear Potentiometer
- Clement and Desormes Apparatus
- Physics Lab Electric Bell
- Reversing Key
- Morse Key
- Function Generator
- Wheel and Axle
- P N JUNCTION DIODE
- Steam Generator
- Joules Calorimeter
- COPPER WATER BATH
- Drawing Board
- Oven & Incubator
- Water Bath
- Laboratory Testing Instruments
- Contact Us
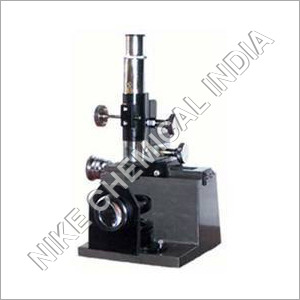
Travelling Microscope
MOQ : 1000 Pieces
Travelling Microscope Specification
- Application
- Laboratory
- View Head
- Upright Monocular view.
- Features
- Precision linear scale, vernier reading system, robust metal frame, anti-reflection optical components, high accuracy for laboratory work.
- Dimension (L*W*H)
- 350 mm X250mm X 80mm Millimeter (mm)
- Spare Parts
- Eyepiece, mirror, and objective available separately.
- Focus System
- Rack and pinion driven coarse and fine adjustment.
- Theory
- The Travelling Microscope is a precise instrument used in laboratories for measuring small lengths with high accuracy. It consists of a microscope mounted on a carriage which moves along a rigid scale, allowing accurate positional readings.
- Drawtube
- Fixed drawtube for stable observations.
- Resolution
- 10 Microns
- Interface
- Manual vernier scale with fine reading system.
- Frame Rate
- Not applicable.
- Focal Distance
- Adjustable as per slide height and objective used.
- Magnification
- 10x
- Dimensions
- 350 mm X 250 mm X 80 mm
- Focus Range
- Coarse and fine adjustment available through rack and pinion mechanism.
- Eyepieces
- Provided, standard wide field (WF 10x).
- Eyepiece Tube
- Monocular aluminum tube.
- Illumination
- Mirror attachment for ambient/artificial light focusing.
- Coarse Adjustment Range
- Provided for major focus changes.
- Fine Adjustment Range
- Fine adjustment screw present for precise focusing.
- Working Stage
- Polished glass stage with two horizontal scales and scales for vertical displacement.
- Still Image Capture Resolution
- Not available (visual observation only).
- Video Capture Resolution
- Not available.
- Image Format
- Visual only, no digital output.
- Interpupillary Distance
- Not adjustable (monocular view).
- Objective Achromatic
- Single objective, standard achromatic optics fitted.
- Condenser
- Not applicable; uses mirror for light source.
- Light Source
- Plano-concave mirror.
- Stage Movement
- Horizontal and vertical precise slide adjustment along graduated metal scales
- Scale Least Count
- 0.01 mm (10 microns per vernier division)
- Material of Construction
- Heavy duty cast iron base with metal components for longevity
- Purpose
- Used for measuring small distances, diameter of wires, thickness and refractive index of materials in laboratory settings
- Maximum Traverse (Horizontal)
- N/A (typically 150 mm travel)
- Optical Path
- Simple straight path for maximum clarity
- Finish
- Powder coated and chrome-plated parts for corrosion resistance
Travelling Microscope Trade Information
- Minimum Order Quantity
- 1000 Pieces
- Payment Terms
- Letter of Credit (L/C), Telegraphic Transfer (T/T), Letter of Credit at Sight (Sight L/C)
- Supply Ability
- 1000 Pieces Per Month
- Delivery Time
- 7 Days
- Sample Available
- Yes
- Sample Policy
- Sample costs shipping and taxes has to be paid by the buyer
- Main Domestic Market
- All India
About Travelling Microscope
Traveling Microscope
Backed by our rich experience in this domain, we are able to manufacture, supply and export of Traveling Microscope. This microscope is reckoned for showing accurate readings and results as per the variegated requirements of clients. Our offered microscope is manufactured using quality-approved cast iron and screws that are obtained from authorized vendors of the market. Owing to high strength, corrosion resistance and sturdy construction, this microscope is highly demanded in the market. Traveling Microscope is extensively used to measure diameters of wool and nylon.
Products Specifications
- Travel horizontally up to 22 cm and vertically up to 15 cm owing to slides
- Eyepiece 10 xs with objective of 15 mm or 75 mm
- Slow motion knobs
Unmatched Measurement Precision
With a least count of 10 microns, this travelling microscope allows users to obtain highly accurate readings for small dimensions, making it critical for experiments requiring meticulous measurement, such as material thickness or the diameter of thin wires.
Rigid Construction and Corrosion Protection
Crafted from heavy-duty cast iron, powder coated, and chrome-plated, all parts ensure a long operational life. This robust design resists corrosion, providing stability and reliability, even during long-term laboratory use.
Versatile Laboratory Applications
From educational setups to advanced research, this microscope accommodates varied measurement needswhether analyzing refractive indices, verifying manufacturing tolerances, or conducting physical science demonstrations.
FAQs of Travelling Microscope:
Q: How is the travelling microscope properly set up for precise measurements?
A: Begin by placing the microscope on a stable laboratory bench. Adjust the stage horizontally or vertically along the graduated metal scales to position your sample, then use the coarse and fine rack and pinion focus controls for sharp imaging and accurate reading.Q: What laboratory tasks can this microscope be used for?
A: It is perfect for measuring the diameter of wires, thickness of materials, small distances, and evaluating refractive indices. Its precision makes it suitable for physics, engineering, and material science research, as well as educational demonstrations.Q: When should I use the fine adjustment mechanism instead of the coarse adjustment?
A: Use the coarse adjustment to bring the object into general focus and the fine adjustment to achieve crisp clarity and precise alignment with the vernier scale divisions, particularly when micrometer-level accuracy is necessary.Q: Where is the best environment to operate this microscope?
A: Conduct operations in a clean, vibration-free laboratory setting with good lighting. The plano-concave mirror can be used to focus ambient or artificial light onto the working stage for optimal visibility.Q: What process should I follow to measure the thickness or diameter of a sample?
A: Place the sample securely on the glass stage, align the microscope above the measurement axis, and carefully slide the stage until the vernier and main scales are properly positioned. Note the readings before and after moving the sample to calculate precise dimensions.Q: How does the powder-coated and chrome-plated finish benefit laboratory users?
A: These finishes significantly enhance the instruments resistance to corrosion and wear, ensuring reliable performance, even in humid or challenging laboratory conditions. This prolongs the service life and maintains consistent measurement accuracy.Q: What are the advantages of the monocular, straight optical path design?
A: The straight-through, monocular optical tube delivers bright, undistorted images, facilitating precise alignments and easy measurements, while reducing optical errors compared to complex pathways.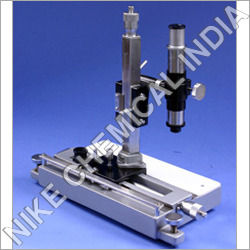
Tell us about your requirement

Price:
Quantity
Select Unit
- 50
- 100
- 200
- 250
- 500
- 1000+
Additional detail
Mobile number
Email
More Products in Microscope Category
Newtons Ring Microscope
Minimum Order Quantity : 1000 Pieces
Application : Laboratory Use
Eyepieces : Huygenian or Ramsden type, single monocular viewing.
Illumination : Compact substage planoconcave mirror with adjustable focusing mechanism.
Magnification : 30x
Dimensions : Height: Approx. 35 cm, Stage diameter: Approx. 1012 cm.
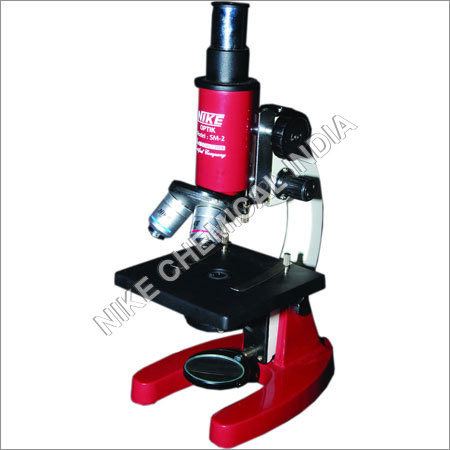
STUDENT MICROSCOPE
Minimum Order Quantity : 1000 Pieces
Application : Laboratory Use
Eyepieces : 10x 16x
Illumination : Mirror illumination for natural or artificial light source.
Magnification : Up to 675x depending on eyepiece and objective used.
Dimensions : Standard laboratory dimensions; portable and compact.
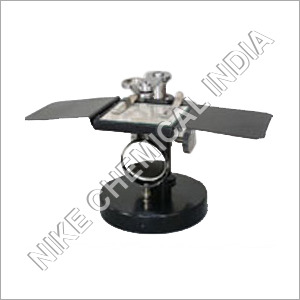
Dissecting Microscope
Minimum Order Quantity : 1000 Pieces
Application : Laboratory
Eyepieces : 10X
Illumination : Substage planoconcave mirror for reflected and transmitted light
Magnification : 10x and 20x
Dimensions : Compact desktop size
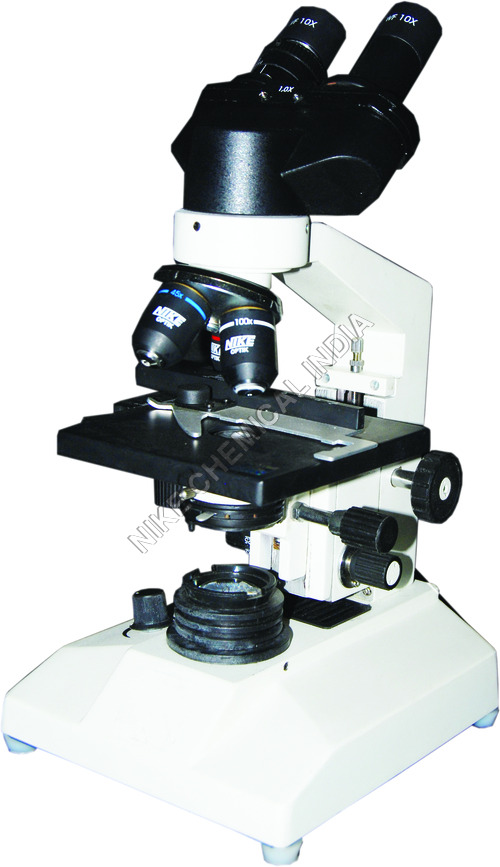
Binocular Microscope
Minimum Order Quantity : 1000 Pieces
Application : Laboratory
Eyepieces : Wide field Eyepiece WF 10x/18 mm
Illumination : 6V 20W Halogen Lamp
Dimensions : 36x26x46.5 Centimeter (cm)

 Send Inquiry
